Creating a VPN Only Lan in OpenWRT
Introduction
This tutorial will cover how to configure an OpenWRT router to have 2 separate networks, one that uses your ISP gateway (for example, “MyWIFI”), and another one that has its traffic routed through a wireguard VPN (like, “MyWIFI_VPN”).
I’ll be using Mullvad VPN for this example, they’re not sponsoring me in any way or kind, you can use any wireguard VPN provider or your own WG server.
Use Cases
Mullvad has a nice tutorial on how to route all your traffic through a VPN on a wireless router, still, that guide teaches you how to route ALL of your LAN traffic through it. This may be undesirable because, for example, some streaming services blacklist VPN provider’s IP addresses, making your family members unable to enjoy their favourite TV shows in Netf***.
Final Results
2 Wireless networks
- Your regular old WiFi network, with your ISP provided IP

- A new WiFi, with traffic routed through the WireGuard VPN server

Previous Steps
This guide assumes that you already have:
- OpenWRT installed and working on your router
- A wireguard server to connect to
- Basic knowledge of OpenWRT, WireGuard and networking
Getting started
Install and configure the necessary tools
-
Install WireGuard in your router
Open your OpenWRT router’s terminal, update your package list and install the necessary packages with the following commands
# Update your package list opkg update # We'll be configuring many options from the LuCI interface opkg install wireguard luci-proto-wireguard -
Generate your public/private WireGuard keys
Run the following command, this will generate two files, “privatekey” and “publickey”
wg genkey | tee privatekey | wg pubkey > publickey # tip: you can use the commands "cat privatekey" # and "cat publickey" to output the private and public keys on the terminal -
Get the Wireguard interface IP address to use. (MULLVAD ONLY)
This step is for mullvad only, and it will change depending on your VPN provider, if you’re using your own wireguard VPN server, you’ll use the peer IP that you’ve configured for the OpenWRT client in the WG server config file.
Run this command in any terminal.
# This is your mullvad account number, generated randomly
account_num=YOUR_MULLVAD_ACCOUNT_NUM
# This is the key you have generated in the previous step
pubkey=YOUR_PUBLIC_WIREGUARD_KEY
curl https://api.mullvad.net/wg/ -d account=$account_num --data-urlencode pubkey=$pubkey
Copy and save the generated internal IP to use when connecting to the mullvad servers.
Create and Configure the Secondary LAN Interface
This lan interface is going to have all its traffic routed via wireguard, in this example this secondary LAN interface is going to be composed of only a secondary wifi network in the 2.4GHz radio, but feel free to experiment with other wifi frequencies and ethernet ports.
- Go into the Network -> Interfaces menu
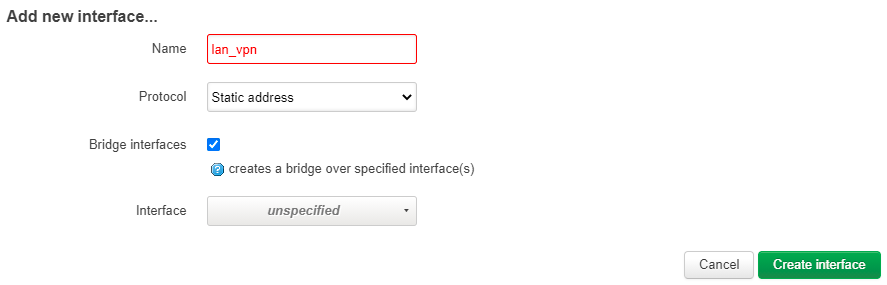
- Click “Add new interface…”
- Enter “lan_vpn” as the interface name, “Static address” as the protocol and check “Bridge Interfaces”
-
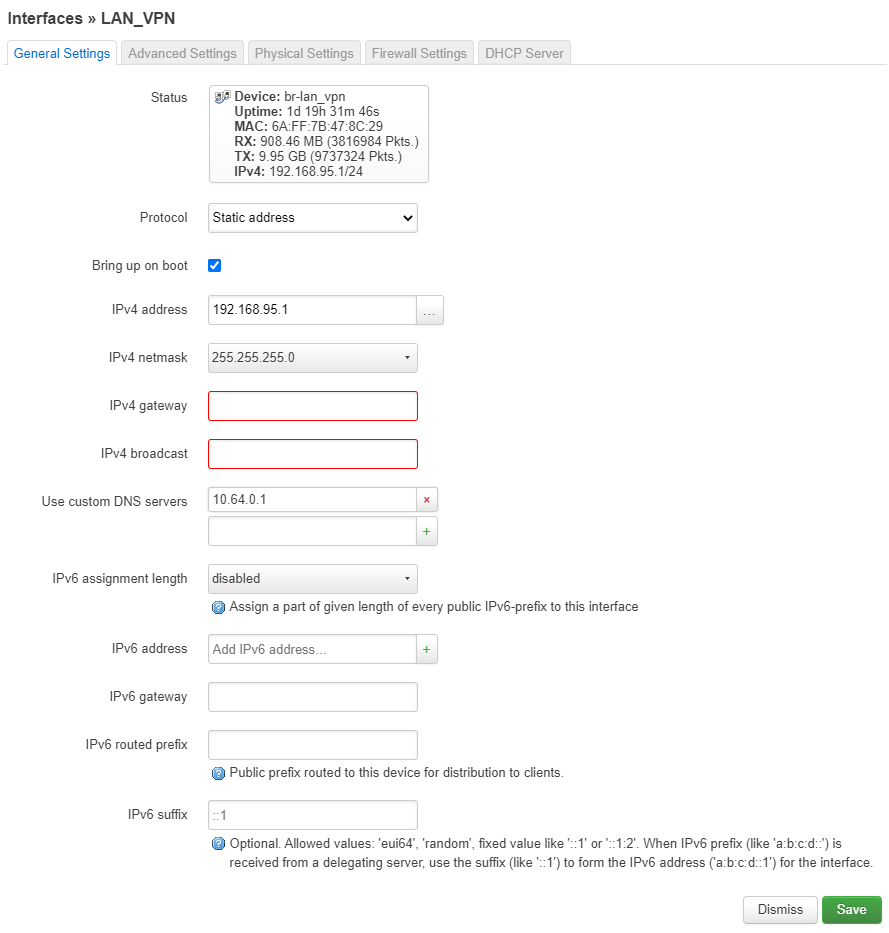
Click on the “Edit” button of the lan_vpn interface
General settings:
- IPv4 address: choose an UNUSED ipv4 address from an UNUSED network, for example: 192.168.95.1
- IPv4 netmask: 255.255.255.0
- Use custom DNS servers: Choose the DNS servers of your VPN provider! This will prevent DNS leaks. For mullvad, it’s 10.64.0.1
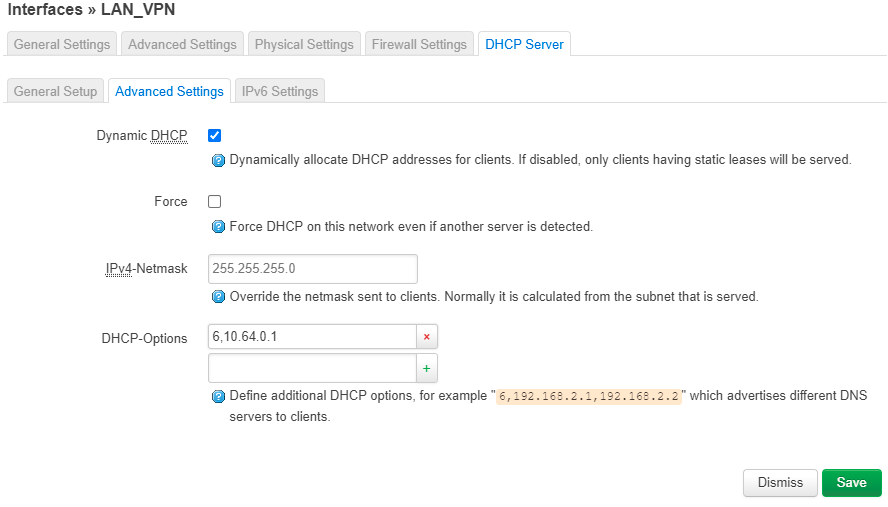
DHCP Server -> Advanced Settings:
- DHCP-Options: enter a 6 followed by a comma and your VPN DNS server, for example, “6,10.64.0.1”
Now we’re going to create the secondary WiFi network
- Connect into your router’s LuCI interface
- Go into the Network -> Wireless menu
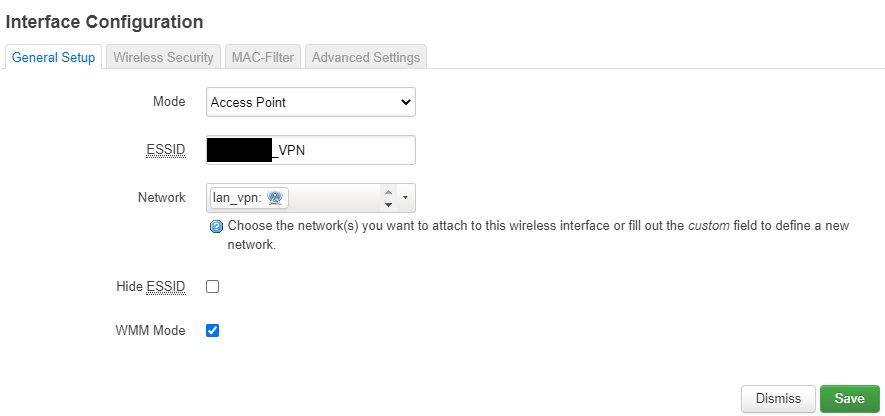
- Click in the “Add” button of the 2.4GHz radio

- Select “Access Point” as the Mode, and enter the desired ESSID and select “lan_vpn” as network.
- Go into Wireless Security, select “WPA2-PSK” as the encryption type, and enter the WiFi password on “key”
Create and configure the WireGuard interface
This interface is going to connect to your WG server as a client, allowing you in the next steps to route the desired vpn-protected traffic into it.
- Connect into your router’s LuCI interface
- Go into the Network -> Interfaces menu
- Click on “add new interface”, put your desired name and select “WireGuard VPN” as the protocol and create the interface

-
Edit the WireGuard interface with the following settings
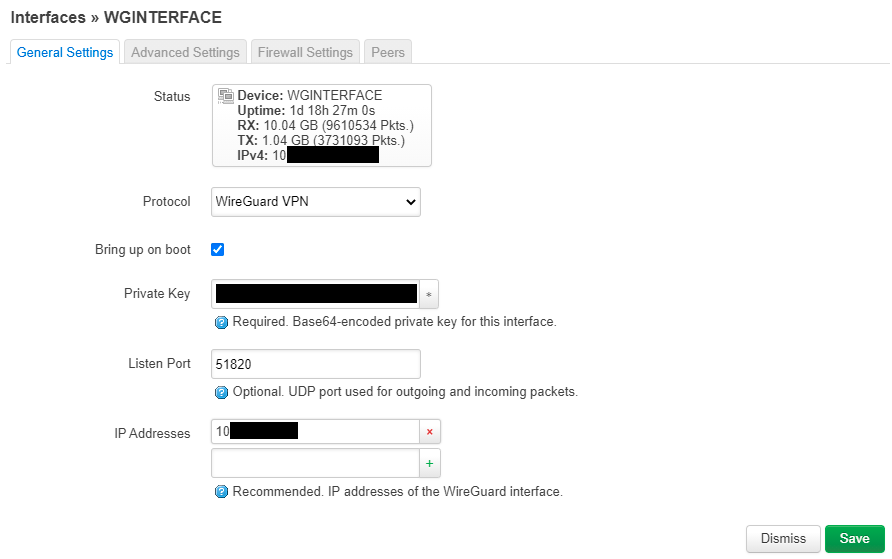
General Settings Tab:
- Private Key: Paste the WG PRIVATE KEY generated in the previous steps
- Listen Port: Enter the Listen Port specified by your VPN provider, leave blank if random. For mullvad, type 51820
- IP Addresses: Enter the IP address that your VPN provider specified for YOU, if using Mullvad it’s the internal IP we generated earlier
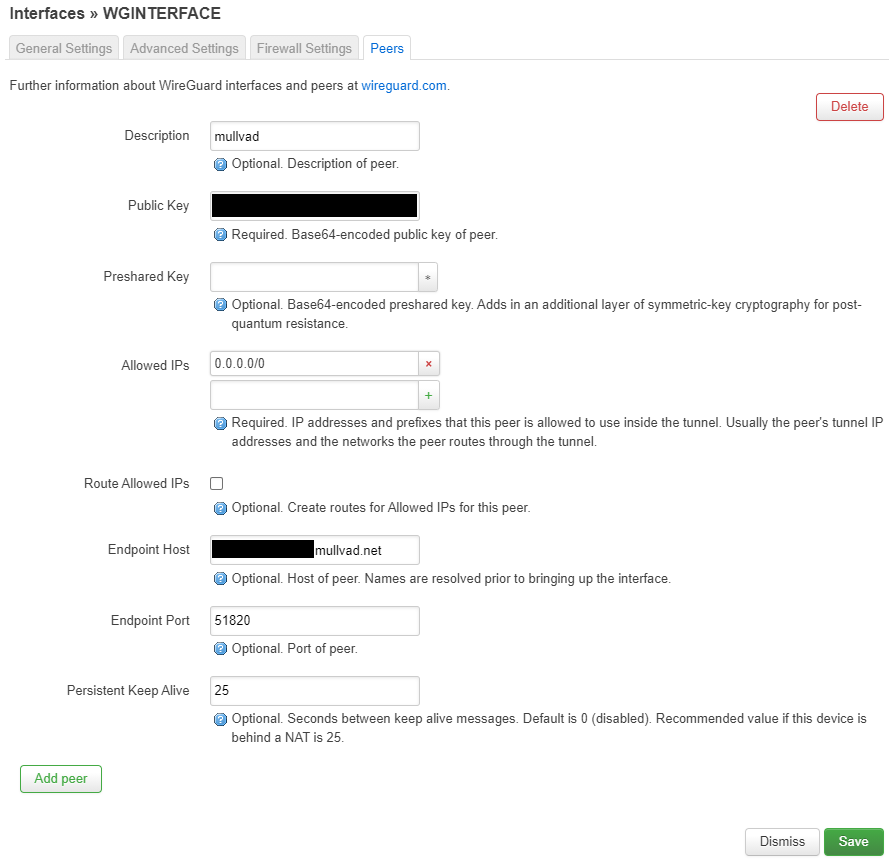
Peers Tab:
- Public Key: The Public key of the WireGuard server you’re trying to connect to
- Allowed IPs: 0.0.0.0/0 (We want to route all lan_vpn traffic through the interface)
- Route Allowed IPs: IMPORTANT, leave this option UNCHECKED, this will route ALL your traffic through the VPN, we just want to route lan_vpn traffic through it, we are going to create the routes manually
- Endpoint host: The public IP address of the wireguard server.
- Endpoint port: The port of the VPN WireGuard Server, if using Mullvad type 51820
Firewall Setup
“WGZONE” Firewall zone
- Go into Network -> Firewall
- Click on “Add” in the Zones group.
- Enter “WGZONE” for the name
- Select “reject” on Input and forward
- Select “accept” on output
- Check the “masquerading” and “mss clamping” boxes
- Choose the WGINTERFACE interface we created previously as the covered network
- Save

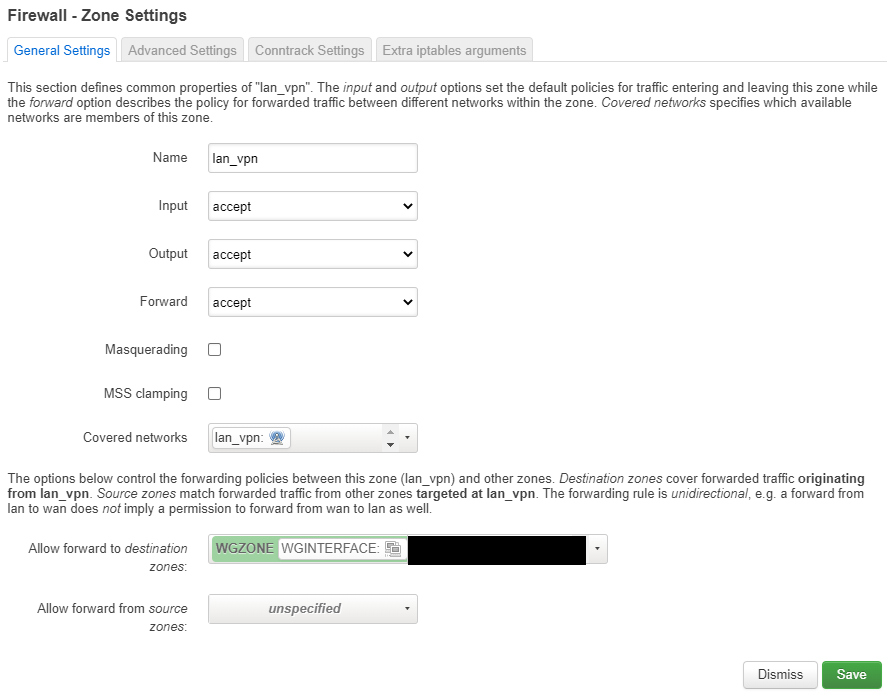
“lan_vpn” Firewall zone
- Go into Network -> Firewall
- Click on “Add” in the Zones group.
- Enter “lan_vpn” for the name
- Select “accept” on Input, output and forward
- Choose the lan_vpn interface we created previously as the covered network
- Choose “WGZONE” in “Allow forward to destination zones”
- Save
Routing
We’re almost done! We have successfully set up
- A lan_vpn interface that covers a wifi_vpn wireless network
- A WGINTERFACE interface that acts as a WireGuard client
- A WGZONE firewall zone that masquerades forwarded packets to the wireguard server gateway
- A lan_vpn firewall zone that can forward to the WGZONE, covering the lan_vpn network we created previously
So you might think that we’re ready, but there still is a problem. If you connect now to your wifi_vpn wireless network, you probably won’t have internet access. Why? Because packets are going to try to exit from your WAN interface (and your firewall is probably going to block them). This is because we have unchecked the option in the wireguard interface to create default routes.
To fix this, we are going to create a new route, that only affects the lan_vpn interface. This route is going to send all traffic (0.0.0.0/0) through the interface WGINTERFACE
-
Enter your router’s ssh console as root
-
Open the file /etc/config/network with nano or vim
nano /etc/config/network -
Add the following lines at the end of the file
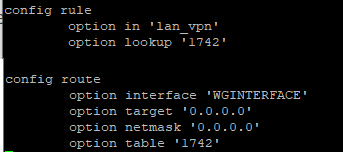
The first rule, tells the router to look for the table ‘1742’ when a packet comes from the ’lan_vpn’
The second rule, creates a route, with table number of ‘1742’ and tells the router to send the traffic through the WGINTERFACE
-
Restart the network service
service network restart
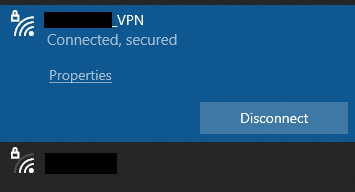
And voila! You should now have two wireless networks. One that uses the VPN, and one that does not!
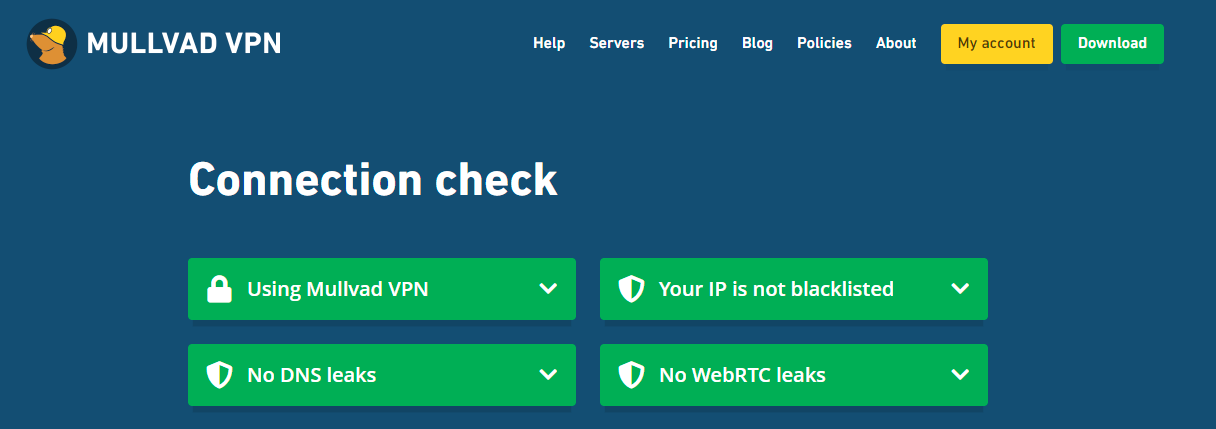
Testing
If using Mullvad you should check here
You can also use traceroute (or tracert on windows)
Route test:
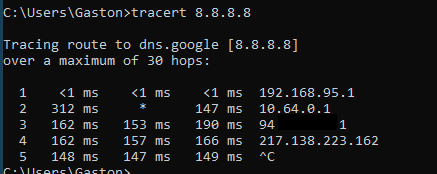
Traffic goes from the router directly into the wireguard gateway, then it exits from the remote vpn server wan gateway.